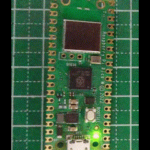
Raspberry PiをWEBサーバーとして運用できるように「nginx」をセットアップしていきます
なお、セキュリティ対策としてBASIC認証を導入していきます
64bit版での動作も確認完了しています
インストール
nginxをインストールします
下表を参考に、必要に応じた機能をインストールしてください
sudo apt install -y nginx php-fpm apache2-utils| パッケージ名 | 必須 | 説明 |
|---|---|---|
| nginx | 〇 | nginx本体 |
| php-fpm | PHP(FPM-CGI binary) | |
| mariadb-client mariadb-server php-mysql | MariaDB関連(データベース) | |
| apache2-utils | ウェブサーバ用ユーティリティプログラム (BASIC認証作成に使用) |
nginxの設定
nginxの設定ファイルは、「/etc/nginx/nginx.conf」にて各フォルダの設定ファイルをインクルードするように作成されています。
user www-data;
worker_processes auto;
pid /run/nginx.pid;
include /etc/nginx/modules-enabled/*.conf;

events {
	worker_connections 768;
	# multi_accept on;
}

http {

	##
	# Basic Settings
	##

(中略)
	include /etc/nginx/mime.types;
	default_type application/octet-stream;
(中略)
	##
	# Virtual Host Configs
	##

	include /etc/nginx/conf.d/*.conf;
	include /etc/nginx/sites-enabled/*;
}
以上より、nginx.confを直接編集せず、必要なサービスの設定ファイルを「/etc/nginx/site-enabled/」の中に作成し、自動読込みで起動するように設定します
また、ブラウザがSSL通信を推奨していますので、自己証明書を作成しSSL通信のテストも併せて行います
自己証明書の作成
自己証明書(通称 オレオレ証明書)を下記のコマンドにて作成します
sudo mkdir /etc/nginx/ssl
cd /etc/nginx/ssl
sudo openssl req -new \
	-x509 -out server.crt \
	-newkey rsa:2048 -keyout server.key \
	-days 3650 -sha256 \
	-subj "/C=JP/CN=webserver" \
	-addext "subjectAltName = DNS:webserver, IP:192.168.1.100" \
	-nodes
sudo chmod a+r /etc/nginx/ssl/server.*
作成した自己証明書は、/etc/nginx/ssl/ の中に作成されます
上記コマンドは、PC名「webserver」、IPアドレスは「192.168.1.100」で記述しています
環境に合わせて適宜修正してください
BASIC認証(パスワードファイルの作成)
接続するユーザー制限が出来るように、認証システムも導入します
以下のコマンドにて、ユーザー、パスワード設定ファイルを作成します
実行の為には、「apache2-utils」をインストールしておいてください
sudo htpasswd -c /etc/nginx/.htpasswd [ユーザー名]
    New password:[パスワード]
    Re-type new password:[パスワード]
設定ファイルの作成
エディタを起動し、サービス用のファイルを記述していきます
sudo nano /etc/nginx/sites-enabled/site1以下の内容を記述します
upstream php {
	server unix:/var/run/php/php7.4-fpm.sock;
	server 127.0.0.1:9000;
}

server {
	listen 80;
	server_name webserver;
	return 301 https://$host/logout.html;
}

server {
	listen 443 ssl http2;
	server_name webserver;

	ssl_certificate /etc/nginx/ssl/server.crt;
	ssl_certificate_key /etc/nginx/ssl/server.key;
	ssl_session_cache shared:SSL:10m;
	add_header Strict-Transport-Security "max-age=31536000; includeSubdomains";

	root /var/www;
	index index.php index.html;

	location = /favicon.ico {
		log_not_found off;
		access_log off;
	}
	location ^~ /private/ {
		auth_basic "closed site";
		auth_basic_user_file /etc/nginx/.htpasswd;
		location ~ \.php$ {
			include fastcgi_params;
			fastcgi_intercept_errors on;
			fastcgi_pass php;
			fastcgi_param SCRIPT_FILENAME $document_root$fastcgi_script_name;
		}
	}
	location / {
		satisfy any;
		allow all;
		root /var/www/html;
		location ~ \.php$ {
			include fastcgi_params;
			fastcgi_intercept_errors on;
			fastcgi_pass php;
			fastcgi_param SCRIPT_FILENAME $document_root$fastcgi_script_name;
		}
	}
	location /logout.html {
		return 401;
	}
}
【解説】
| upstream php { … } | php実行処理 |
| server { … } | WEBサービスの単位 |
| listen | WEBサービスの対応ポート番号 |
| server_name | アクセス名(例では、自己証明書作成時に指定した「webserver」) |
| ssl_certificate, ssl_certificate_key | 証明書の指定 |
| location ^~ /private/ { … } | BASIC認証(アクセス時、ログイン処理を求められる) 本例では、/var/www/private/以下のページにログイン画面が表示されます |
| auth_basic… | BASIC認証の設定 |
| location ~ .php$ { … } | PHP設定(上記「upstream」を呼び出します) |
| location / { … } | ルートフォルダ用設定 (「satisfy any、allow all」でBASIC認証は不要となります) |
| location /logout.html | BASIC認証のログアウト処理 |
設定ファイルの検証
nginx -tnginxサービスの再起動
sudo systemctl restart nginxLet’s Encrypt による証明書の作成
予め、ダイナミックDNS等によるアドレスの取得と、ルーター等よりポート開放を行い、外部(インターネット)からアクセスできるようにしておく必要があります
以下のコマンドで作成します
sudo apt install -y snapd
sudo snap install core
# "/etc/ld.so.preload cannot be preloaded"のエラーが出る場合
#   sudo nano /etc/ld.so.preload
#       #/usr/lib/arm-linux-gnueabihf/libarmmem-${PLATFORM}.so    ←コメントアウトします
sudo snap install --classic certbot
sudo ln -s /snap/bin/certbot /usr/bin/certbot
sudo certbot --nginx
  Which names would you like to activate HTTPS for?
  - - - - - - - - - - - - - - - - - - - - - - - - - - - - - - - - - - - - - - - -
  1: xxxxx.xx.xx
  - - - - - - - - - - - - - - - - - - - - - - - - - - - - - - - - - - - - - - - -
  blank to select all options shown (Enter 'c' to cancel): 1      ←上記有効にするHTTPSサーバーを選択します
(中略)
  Select the appropriate number [1-2] then [enter] (press 'c' to cancel): 2  ←HTTPSにリダイレクトさせます
(後略)


